Showing posts with label Cricut Imagine. Show all posts

Friday, March 16, 2012

Disney Happy Birthday!

Happy Friday!  I've been home all week with a sick boy so it doesn't seem much like a Friday but hey I'll take it.  If you read my earlier post you know I just fine tuned my Imagine and it's been working fantastic.  I had made some 3" Disney Characters for some note cards and they were too small.  So I had them left over.  I decided to make a birthday card using only the Imagine. 


The base of this card is 6 1/2" x 5"
I used Imagine More Cards for the background paper and for the Happy Birthday across the bottom.
Then I just added some pop dots to the back of Mickey and Donald and stuck them on.  I used to hate cutting the Mickey Characters out because I couldn't get the colors right or all the layers were too much.  But with the Imagine it is a piece of cake. I love it!


Well thanks for stopping by, please come back again soon!

Wednesday, October 19, 2011

The Perfect "Pair".

Hi everyone! Wow it's been awhile, I know.   I have been completly sucked into Pinterest.  Have you ever checked out this site? Well if you haven't I'm warning you now, It's HIGHLY addicting.  I'm trying to balance all this stuff and it's really hard. Well if you need a invite click on the Pinterest link to the right.
Well back to the real reason Im here, to share my recent card.  I bought this Pear sentiment stamp a while back in the clearance rack for $.5o.  It is by Studio G.  I made this card using the Imagine More Cards Cartridge.  I then mounted it on a Scallop square card.  I added some ribbon an here ya go!
Here it is! Hope you liked it.

Monday, September 12, 2011

Hello Card made from all scraps

I've been working on getting more organized lately.  I feel like its a never ending battle.  I get everything organized but by the time it's all organized I get a more cartridges or more "stuff" and I have to re organize to make room.  But I guess it's good problem to have.  I have 2 shoe boxes full of cuts that I've made with my Cricut/Imagine that I ended up not using.  Well I went back through these boxes and got rid of a whole bunch.  I'm not going to think to go look through this box.  It would take more time to look through then it would to just re cut the image.  But I did save some.  I made this card completely from scraps out of my box full of cuts.


The oval is printed and cut from the Imagine as is the girl.
The tag is from a Fiscars punch then stamped.
Everything on here is basically from scraps. I added the ribbon, some stickles and a sentiment and Walla a quick hello card made from scraps.

Thanks for looking! Please come back again soon.


Thursday, July 28, 2011

A few more Imagine Cards

Hello everyone! I should still be camping, if blogger is posting correctly.  But I made a few more cards before I left that I wanted to share.  I used  my girlfriends cartridges.

This card is from Imagine More Cards. I hate taking any kind of credit for these cards.  I feel the Imagine does all the work.  I just put it all together.

Get Whale soon...haha get it? I know I'm a dork but I love this one.  I added some stickles on the whale.  Doesn't it just make you smile?


Here's another one that is fun.  Since I borrowed this cartridge from a friend I couldn't link it onto my gypsy and create the actual card in the same shape as the front of the card.  So I tried to make it similar.  I would do it different next time but for now it'll have to do.  It's bright and happy.


Now here is another fun card. I'm telling you I love this cartridge.  All these papers were printed from the Imagine More Cartridge.  Again can't take the credit. The Imagine printed everything out and I just put it all together. Oh and well added a little bow.


I've done all these cards and a few more in probably a couple of hours. I love these cartridges and this machine.
Thanks for taking a look, I hope to be home tomorrow!


Sunday, July 24, 2011

I think your sweet and I Whaley Love you.

Hello everyone! I've been so busy getting ready for girls camp. But I wanted to get a few things posted before I go and also I'm scheduling a few things to post while I'm gone.  I have found though that Blogger doesn't alway post my scheduled blogs so fingers crossed Blogger will cooperate this week and if not well I will see ya next week.
Here are  a couple cards I made with my Imagine.  I barrowed a girlfriends Yummy Cartridge and Imagine More Cards Cartridge.  I absolutly love these and will for sure be getting them for myself.

The first card here is done with Yummy.  I backed it with pink paper embossed with the swirl Cuttlebug folder.  I inked the edges with brown ink.  I added a couple jewels with my i-rock. The sentiment is from one of the $1 bins.  I then added stickles to the cherry.

This next card is from Imagine More Cards.  This makes card making rediculously easy.  The hardest part was making the scallop shaped card in the Gypsy but I did that while everything in the Imagine was printing and cutting.  I did cut it in layers and pop dot it ,even though it's hard to see in the photo.  This is a must have cartridge as well.


So these are my cards for today.  Thanks so much for stopping by, I hope you come back again soon!

Thursday, July 21, 2011

A "Yummy" Happy Birthday!

HI! Hope everyone is having a fabulous day, I know I am.  I'm getting ready to go to girls camp for 5 days. But during the time that I am gone I will have missed my 15th Wedding anniversary, my little brothers 18th birthday and my Sister in-laws birthday. So before I go I have got to get cards made and out for delivery while I'm gone.

I have a friend who just ordered her Imagine.  She got 4 Cartridges with her bundle, as did I. But she got 3 different cartridges then I did.  She let me barrow a couple that I didn't have. The Yummy and Imagine More Cards. 

Here is the Birthday Card I did for my Sweet Sister in Law.  The cupcake is cut in layers from the Yummy Imagine cartridge.  I stickled the sprinkles in different colors.  The background Polk a dot paper is from Colorbok Memories made easy photo mats book. I used a Fiscars tag punch for the tag. The Happy Birthday and Celebrate were stamped from a Michael's sentiment clear stamp set.


Well that is all I have time for for now but I have many more to share so stay tuned!
Thanks for stopping by


Friday, July 1, 2011

It's A Girl!

Happy Friday everyone!  Today I have a baby card to show you.  My girlfriend just had a baby girl.  I know what your thinking, "Why is the card blue"?  Well she absolutely hates pink.  She's not a girly girl herself and she said she wouldn't put her baby girl in pink.  So I thought why would I do a pink card.  I love the Nursery Tails Imagine Cartridge and I've been trying to use my imagine more lately.   

The plaid background paper is from DCWV.
Card Size is 5 1/2x6 1/2
Giraffe is cut using the layer feature at size 5.25"
The It's A Girl sentiment was printed in blue from computer then punched with Fiscars Scallop Oval punch.
I then inked the edges with blue ink and
added a green ribbon with a bow.


I added a piece of light blue paper on the inside punched the corners and used another cut from Nursery Tails and stamped Congratulations.


Thank you for taking time out of your day to visit my Blog. I hope you enjoyed and that you come back again soon.

Wednesday, April 6, 2011

Shrinky Dinks and the Imagine


Well this picture really just doesn't do this justice and I didn't realize it till I had all ready given the bracelet to my Niece. I made this cute little bracelet using shrinky Dinks and my imagine.
Pretty simple really, you just need the Shrinky Dinks. You create the image on the Imagine. You want to make it rather big because it does shrink down quit a bit.  I believe I did 1 3/4".  Then when you print them out you want to flip the image. Make sure you punch a hole in the top using a standard size hole punch BEFORE shrinking them.  Then once you have baked them as directed on package you put on the jump ring and hang them on a bracelet. This bracelet match her card and her gift bag and (I think) was a big hit.

Thanks for looking!
                                                                      

Monday, March 28, 2011

Quick Appreciation Gift

It's time for another Teacher appreciation spot light.  With this gift I used my Imagine. I used the Imagine more Cartridge. Just had a plain Sm clipboard and plain little composition notebook.

I then took scraps and put them on the gift bag.  The zigzag is a ek Success edge punch.  I then added the flowers and a brad from my collection.


Friday, March 25, 2011

Imagine Side Step Birthday Card

This is just quick  and simple card I whipped up using my Imagine.  I made this card for my little neice who will be 9 on Monday. Everything except for the Happy Birthday was cut using the Best Friends Cartridge.  The Happy Birthday was also cut using  the Imagine using the Martha Stewart all occasions cake art cartridge.
Thanks for looking! I hope to see you back again soon!
                                                               

Tuesday, February 1, 2011

My "PINK" Imagine!

If I remember right when the Imagine first came out or right before they were saying we could buy replacement parts to customize it to our favorite color.  I haven't heard another thing about it.  So I was thinking, why couldn't I just paint it myself? So that is just what I did.
I set out today to find pink spray paint that would adhere to plastic.  I went to Walmart and well they didn't have it in pink. They had a really light purple but no pink. So I set out to Lowes to see what they had. I found this spray paint and though it doesn't say on the front of the can that it is made for plastics like some of them do, it does say on the back of the can that it works on most plastics.  I went ahead and took the chance.
How'd you do it  you ask?  Well I learned by doing and so I will share some tips with you so you don't have to go through what I did.  First thing is taking the trim off.  The front strip...
This is only attached by 3 magnets. The lip you see here up on the top of the strip slids up under the handle you use to open the machine. It is easier to pull this off after the Imagine is open.

Now for the sides. I didn't have a clue how to get the sides off. So I just kinda pulled on it and well suprising enough they, pretty easily, came right off. So once I pulled the sides off there were screws with little metal like spacers. I just unscrewed the screws, pulled off the spacers and pulled off the plastic cover up. I then spray painted. There was no need to tape off anything. Although I did cover the magnets as shown above on the front trim piece. I didn't paint that side but I did tape off just to be safe.  So I let everything dry and I brought them in.

Now for the learning part.  I went to put the sides back on and well the screws and spacers I couldn't get lined up for it to slide back on.  That is when I realized that there is access to the screws while the trim is on the machine and I probably should've unscrewed the screws before taking off the sides. But luckily no damage was done. So how I put it back together is I slid the metal spacers into the machine it's self. Then I put the side trim pieces on. Make sure the bottoms click in. Also there is a Left side and Right side. The inside of the trim is marked L or R. Then I was able to put the screws in. They went right in right through the spacers. Then I put the black plastic cover piece in.
So There you have it a Pink "do it yourself" Imagine. Thanks for checking it out. If you decide to color yours I'd love to see it. See you next time.

Friday, January 7, 2011

First Layout of 2011


I really loved how this Layout turned out. It is the first LO I've done this year and really the first one I've done in a really long time. I've got so much catch up to do.
Over on the Cricut Message Board they do a Challenge where a sketch is posted and everyone creates a LO using the sketch as inspiration. I love this because then I know I will get at least one page done a week.  Here is the sketch where I got my inspiration.


I used the Imagine to print out the back ground paper from the Imagine More Cartridge. I then used the G&BS cart for the Circles. The piano,trumpet and phrase is from the Quarter Note cartridge and the flourish is from Home Decor.

Sunday, January 2, 2011

Thank you cards!!


While I was going through my surgery people came in and brought my family meals. What a great comfort knowing they are taken care of. I had my mother in law there and my daughter is a great cook but it was one less thing they had to worry about. Then once I got home we recieved a few meals so it was a relief for me to not have to burden the family to make dinner. I am so Thankfull for all the ladies that took time out of there lives to make mine easier. I made them each Thank you cards with matching envelopes.

This cowboy hat card is for a gal that has the cutest little 3 yr old boy who is always wearing a cowboy hat and his favorite color is pink. I used the Cricut Cake cartridge Birthday cakes for the cowboy hat and the Martha Stewart border punch.
 This card I used the new Smiley Cards for the first time and I used the peachy keen Simple sallies stamps for the first time as well. I think it turned out pretty cute. The punched flower border I used was from Recolections.
 This butterfly card I used the Wall Decor and More Cartridge, Martha stewart border punch and the i-rock. The photo doesn't show but there are little i-rock crystals on the butterfly.
 I made this card using only the Imagine. I used the best friends cartridge for the girl and the polk a dot background paper. I used Beyond Birthdays cartridge on the Imagine for the thank you. I also used the i-rock for the bling.I then printed the girl on the card, right onto the envelope.
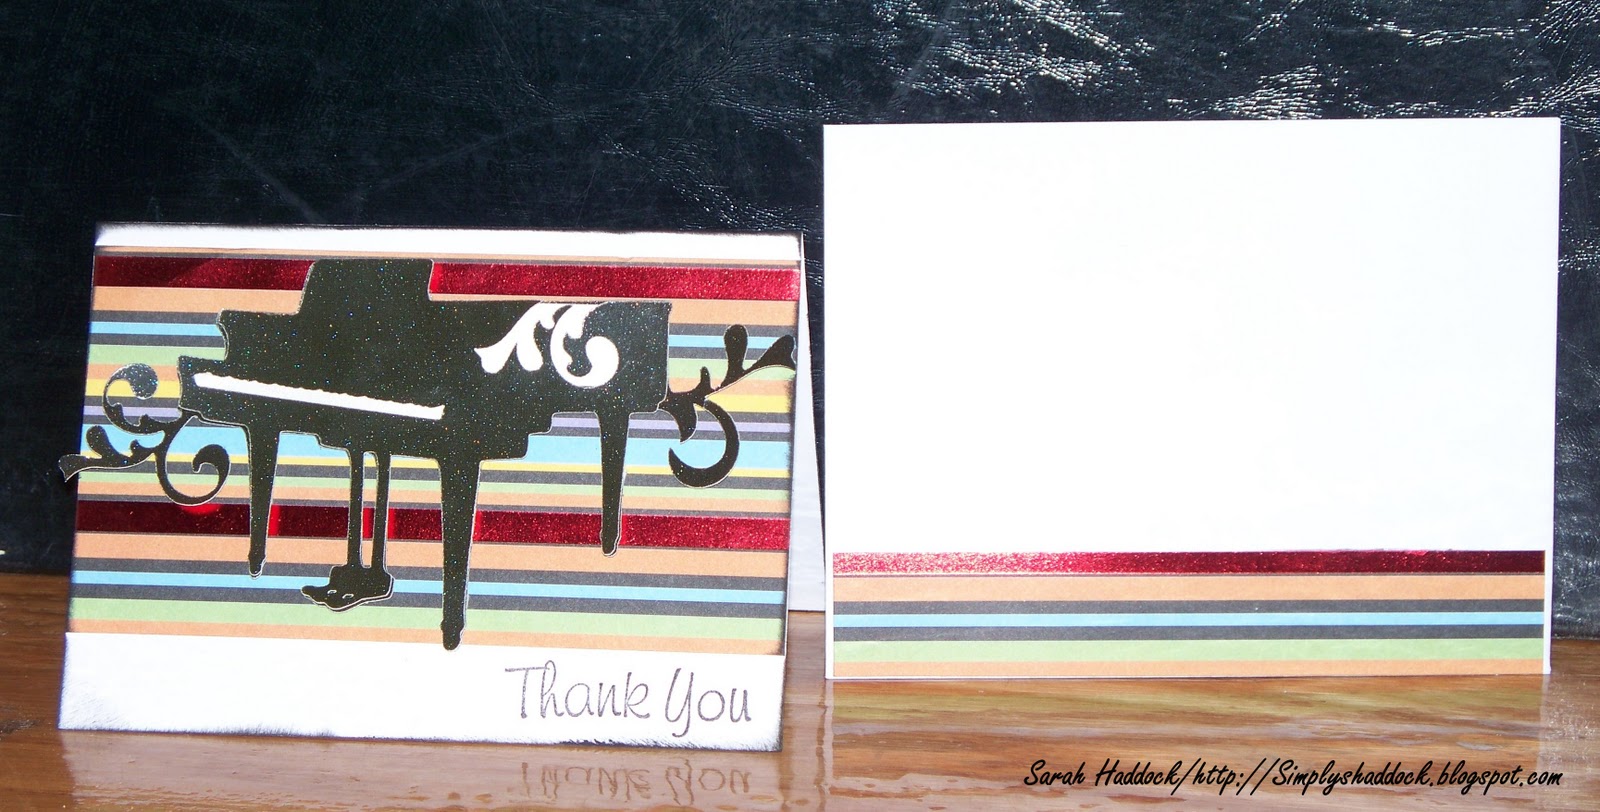
 This card is actually for a customer at my store who heard of my surgery and sent me a get well card. I thought that was so sweet. I needed a not girly card since he is male. I came up with the piano. I don't know him really so I don't know if he is into music but I figured music is for anyone. I used the new Quarter Note cartridge, which I love by the way.
 Here is another card made with the Imagine. I used the Lori's Garden cartridge and again printed the butterfly right on the envelope.

Saturday, January 1, 2011

Best Friends Clip board


I had this old clip board that I inherited from my grandma when she passed away. It's been sitting on my desk and I was ready to decorate it a little. I had my Imagine running the other night making some Thank You cards so I decided to use my Imagine, Best Friends Cartridge. This is what I came up with. I didn't layer so that it would lay flat. I covered the back with just the plaid paper same as front. Then I added some black inking to the edges.

Monday, November 22, 2010

Imagine Blog Hop


Welcome and Thanks for stopping by. I am so excited for this Imagine Blog Hop because it is the first Hop that I've gotten to share a project that I've made. I wasn't going to buy an Imagine. Why? I have the Expression and the Baby, I didn't feel that I needed it. Well I watched the launch and all the beautiful projects and I couldn't control myself. I am so glad that I took the leap. I love this machine and the endless possibilities.

If you've come here from Mindy's Blog , you're on the right track. If you're just starting out, you can continue on from here and hop around in a circle until you arrive right back here! When you're done here, hop along to Jeannie's blog and see what she has created for us.

I made this little paper bag album for my daughter. She just started Jr. High this year and has become really good friends with a girl at school. I thought it would be a fun little keepsake of things they like and do together.


I used the Best Friends Cartridge only and only used the Imagine. I used the Provo Craft Punch 'n' Bind to bind the book.


I bought this several years ago on either QVC or HSN I don't remember but I have never seen it again and was curious if anyone else had ever seen it. But its great for binding smaller projects.


So here you have it my paper bag album. It was very easy . The Imagine did all the work, all I did was some inking and added some i-rock bling here and there. Speaking of i-rock......

BLOG CANDY


For this Blog Hop I'm giving away a i-rock by Imaginisce. All's I ask is that you leave a comment with a way to contact you. You don't have to be a follower unless of course you want to. So good luck and thanks for stopping by.
Now don't forget to Hop on over to Jeannie's blog next.
Here is a complete list of all the blogs participating in this hop, so make sure you don't miss out.


Lori Brown savingmine.blogspot.com

Robin Jones custom-cumforts.blogspot.com

Tina thecrippledcricut.blogspot.com

Linda Panattoni mulberryvillagecreates.blogspot.com

Angel Urell creativecraftin.blogspot.com

Tisha Grindly myscrappingtreasures.blogspot.com

Telina telinaspapermania.blogspot.com

Mindy Rapp scrappyandpiggy.blogspot.com

Sarah Haddock simplyshaddock.blogspot.com (That's me!!)

Jeannie Horton nonnasscraps.blogspot.com

Mandie Wade mandiesscrappin.blogspot.com
Related Posts Plugin for WordPress, Blogger...