Showing posts with label Video. Show all posts

Tuesday, August 14, 2012

Customized Signs with the Lucky 8 punches.


Happy Tuesday!  Today I wanted to post several door signs I've made over the last few months.  I've made these for Teacher gifts, friends and family.  I absolutely love making them.  They are so easy, fun and make people smile.

The first sign I made was for my son's 5th grade teacher last year.  
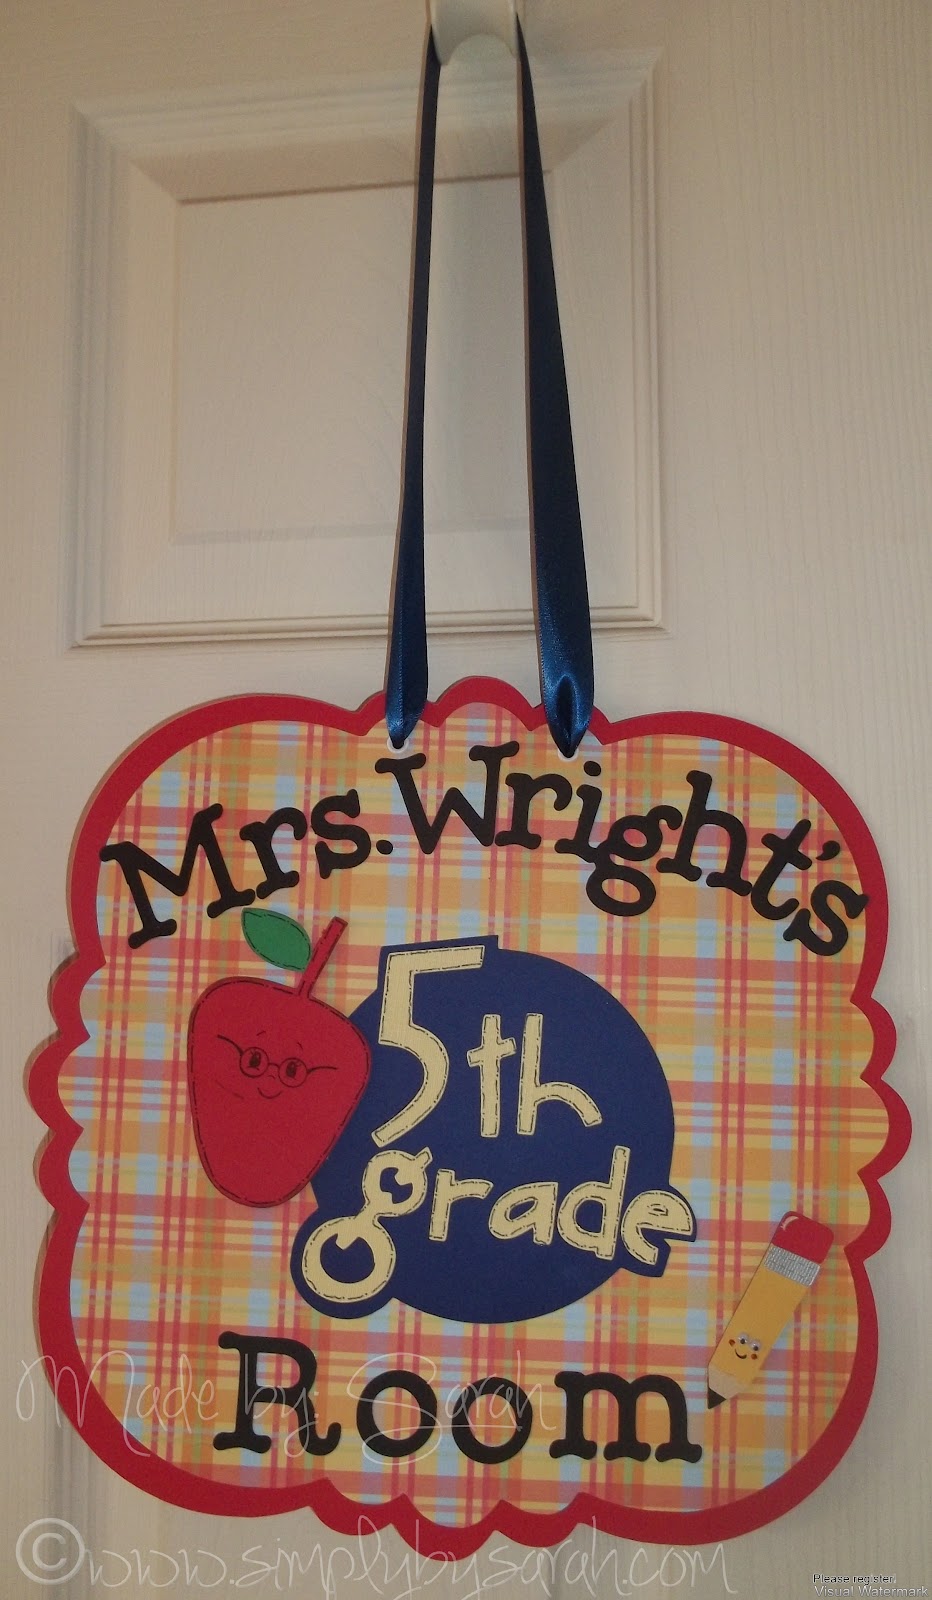
  • I used Lacy Labels for this sign cut red paper at 11.90"
  • The plaid paper is from the DCWV school  paper pack cut at 11.13"
  • The 5th grade was cut at 5.39" using Locker Talk
  • The apple is also cut from Locker cut at 3.85"
  • Then I stamped on the face from Peechy Keen Simple Sallies stamps
  • The pencil was precut from Doodle Charm I believe
  • Then I believe the letters were cut from Cricut Alphabet at 1.35"


The next  sign I made for my niece.  They both love Hello Kitty.

  • The measurements on the paper background is the same as the above.
  • The Hello Kitty was cut at 4.29"
  • The Letters were also cut using Cricut Alphabet.


This next sign I made for my Nail lady.  She just moved into her own room in the salon and as I was sitting there one day I noticed nothing on the door but a nail.  So I asked her what she wanted and she went with skulls.  I was glad I had asked because I would've done something nail related.  But this turned out totally her.
  • The background paper measurements are again the same as above.
  • The Skull is cut from Indie Art and is cut at 4.76" you can't tell but I inked around it with black ink.
  • The studds on skull are from imaginisce.
  • The letters are cut from Sans Serif at 1.82"

This last sign was made using the Lucky 8 Punch.  Have you seen these things? They really are cool.  Very big, but cool.  


  • I used a red sheet of 12 x 12" paper and punched it with the Lucky 8 Punch
  • For the second layer of paper I used an 11 x 11" paper printed from the Imagine using the Imagine More Cartridge and then punched with the Lucky 8 Punch
  • The Piano was cut from Quarter Note Cartridge along with the music notes.
  • The Name was cut from Cricut Alphabet.


After posting several of these little signs I realized I have several more that I haven't even taken pictures of.  I made a quick video showing you how the Lucky 8 punch works so if you were curious here it is.


Thanks so much for stopping by, have a great day and come back again soon!


Monday, August 13, 2012

3 x 3 Wedding Favors w/ video


Hello Everyone! I made it through today and I haven't melted yet, LOL. Holy Cow it's been HOT! But it's a dry heat and I'd much rather heat then cold so I'm not complaining (too much :)).  

I've been so excited to share with you these little boxes I made for a wedding a couple of weeks ago.  The brides colors were purple and yellow.  Her theme was based on the quote, "If life gives you lemons, make lemonade."  She needed something cute to tell her guest thanks for coming and put lemon drops in.

I took on the Challenge.  Her new name began with an R so I started with the Monogram on the front.  I'm telling you these photo's don't do them justice and I should have taken pictures of them on the tables clothes at the wedding because they looked perfect!  The base color was dark purple.  The R is backed on a light purple. Then I used a super light yellow, ran through the Xyron and then used Martha Stewart Crystal fine glitter the make it sparkle.

 The boxes opened up and on the inside cover is the Quote and then I put a clear window in for the quest to see what's inside.

 Then there is a drawer that pulled out for the candy.  Again I loved them thought they turned out super cute and she loved them.  I did a video on how I made the boxes so if you'd like to give them a try.


I'd love to hear what you think about these boxes so please leave me a comment and thanks so much for stopping by!


Wednesday, February 22, 2012

Mini Treat Holders with a Video


Hello and Happy Hump day!  I'm so super excited I made my first video since moving into our new house.  I learned how to make these little boxes from Sarah Hamer at pinkcricut.com on one of her Live Ustreams.  I made dozens of these little gift bags for Valentine's Day treats this year.  I had several people want to know how to make them so here you go.


Thanks for looking! Please come back again soon!


Saturday, August 20, 2011

Fabric Flowers

 Happy Saturday everyone!  I learned at girls camp how to make these great fabric flowers and wanted to share with you.  You can used these flowers to decorate frames, clothes, jewelry, hair, pages, cards.  I mean the possibilities are endless. 

       Here is what you will need to make these flowers.

*  Fabric:  satin or silky kind
*  votive candle/ lighter or match
*  Felt
* Circle Template or Cricut


Thank you for stopping by,  I hope to see you back again soon!


Thursday, April 7, 2011

Binder Clip Photo Holders

I love to make party favors, Invitations and really any kind of handouts, as do a lot of you I'm sure.  This particular one I hadn't done before.  It was suggested to me to make these binder clip photo holders.  I had never done or even seen one done before.  But after seeing a picture of what they were looking for I got started.  It really wasn't hard as you will be able to see in the video. A little paper, some bling and Walla!


                                  Thanks for looking and watching, Hope you come back soon!
                                                               

Thursday, March 10, 2011

Gift Card Holders

Hey everyone! If any of you are like me you watch everything that goes into the garbage because, "I might be able to do something with that."  Well that went for the Toilet paper rolls as well.  I wanted something cute to mail a gift card in.


The frog and the bee are from Create a Critter and the cute little dancing owl is from Twinkle Toes.

Here is a quick show of how I made these.


This cupcake was make using the Sweet Treats Cartridge. I used Martha Stewart
Tourmaline Glitter for the heart.


                                      Thanks for stopping by. Hope to see you back again soon!


Friday, February 11, 2011

How to make a Tri Fold Shutter card...My first Video.

Well I've enjoyed all the videos out there that have taught me so much. I decided I wanted to pay it forward and hopefully teach someone else something.  I've been pretty nervous about doing it but now that I have it was so much fun.  I hope that you enjoy. I know it's kinda cheesy I'm still new with figuring out the editing, so any feed back would be much appreciated.

I made a card back in January for the Valentines Day Card Blog Hop and this is the card that I'm showing today how to make. Enjoy!!


Related Posts Plugin for WordPress, Blogger...