Showing posts with label Indie Art. Show all posts

Tuesday, August 14, 2012

Customized Signs with the Lucky 8 punches.


Happy Tuesday!  Today I wanted to post several door signs I've made over the last few months.  I've made these for Teacher gifts, friends and family.  I absolutely love making them.  They are so easy, fun and make people smile.

The first sign I made was for my son's 5th grade teacher last year.  

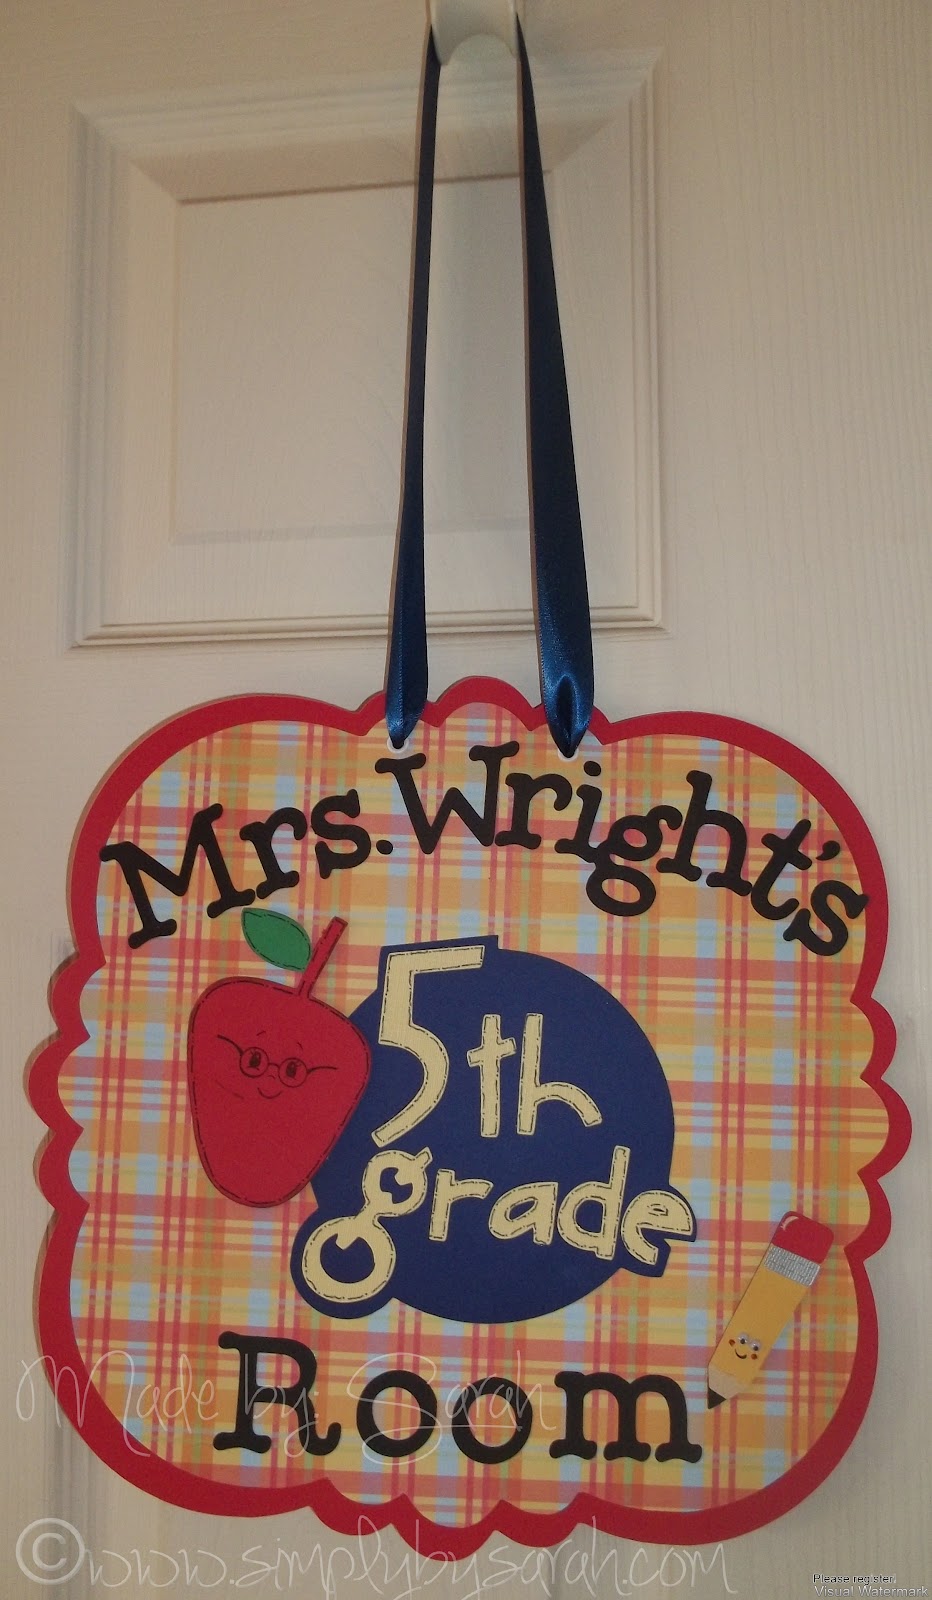
  • I used Lacy Labels for this sign cut red paper at 11.90"
  • The plaid paper is from the DCWV school  paper pack cut at 11.13"
  • The 5th grade was cut at 5.39" using Locker Talk
  • The apple is also cut from Locker cut at 3.85"
  • Then I stamped on the face from Peechy Keen Simple Sallies stamps
  • The pencil was precut from Doodle Charm I believe
  • Then I believe the letters were cut from Cricut Alphabet at 1.35"


The next  sign I made for my niece.  They both love Hello Kitty.

  • The measurements on the paper background is the same as the above.
  • The Hello Kitty was cut at 4.29"
  • The Letters were also cut using Cricut Alphabet.


This next sign I made for my Nail lady.  She just moved into her own room in the salon and as I was sitting there one day I noticed nothing on the door but a nail.  So I asked her what she wanted and she went with skulls.  I was glad I had asked because I would've done something nail related.  But this turned out totally her.
  • The background paper measurements are again the same as above.
  • The Skull is cut from Indie Art and is cut at 4.76" you can't tell but I inked around it with black ink.
  • The studds on skull are from imaginisce.
  • The letters are cut from Sans Serif at 1.82"

This last sign was made using the Lucky 8 Punch.  Have you seen these things? They really are cool.  Very big, but cool.  


  • I used a red sheet of 12 x 12" paper and punched it with the Lucky 8 Punch
  • For the second layer of paper I used an 11 x 11" paper printed from the Imagine using the Imagine More Cartridge and then punched with the Lucky 8 Punch
  • The Piano was cut from Quarter Note Cartridge along with the music notes.
  • The Name was cut from Cricut Alphabet.


After posting several of these little signs I realized I have several more that I haven't even taken pictures of.  I made a quick video showing you how the Lucky 8 punch works so if you were curious here it is.


Thanks so much for stopping by, have a great day and come back again soon!


Thursday, October 20, 2011

"Spooky"

Halloween is coming and although I don't really get into it as far as dressing up or even decorating I do have to say card making and scrapbooking Halloween is a lot of fun. I made the scallop shaped card on my gypsy using a gift tag from  Christmas Cheer. I hid some parts, welded other parts and this is what I came up with.  (I LOVE my Gypsy.)  The Skelleton head is from Indie Art and the Spooky stamp is a $1 bin stamp stamped with white ink.

For the inside I just added some orange paper and stamped Happy Halloween. 

Hope you liked and arn't totally shocked to have gotten 2 post from me in a row...lol. I'm working on working smarter and not harder. Hope to see ya again tomorrow, thanks for stopping by.

Monday, February 14, 2011

Happy Valentine's Day!


I made this for the hubby. Love these lips! I cut them at 3" from Indie Art. The border punch is from Michael's it's there Recollection's brand. The lips are covered in Martha Stewart "garnet" glitter.
Hope everyone has a very Happy Valentine's Day!

Thursday, September 2, 2010

Chore Clip Boards


My kids are great kids but they seem to always forget what Chores they have to do.I needed something that they could refer to daily to remind them. I didn't really want to do the chore chart. We've done that before I wanted something different. This is what I came up with. The clip boards I was able to customize to each of them and we can hang it on the wall fairly easily. Plus they get the satisfaction of moving one chore stick from the "to-do" pocket to the "Done" pocket

I took a standard clip board and painted it Black with some acrylic paint. I used the sewing machine to attach the pocket and then sewed down the middle to separate the To-do pocket from the Done pocket. Then with a Sharpie I wrote each chore on (all ready painted)Popsicle sticks from the $1 store. I used the Indie Art Cartridge for the designs and Base Camp for the Writing.I also used a standard clip board and painted it purple with acrylic paint. I used the Base Camp for the writing and used Gypsy Wanderings for the music notes. I used the Crop-a-dile to punch holes in the Popsicle sticks then tied ribbon through the.

Friday, August 13, 2010

Back to School 2009


I'm a little behind but here is last years Back to School page. Jaidens polo has skulls on it, hince the inspiration for the skulls. That and going back to school is just so dreadful, it's rough being a kid.
I used the Indie Art cartridge for the skulls and printing 101 for the Back 2 School.
Related Posts Plugin for WordPress, Blogger...