Friday, February 22, 2013

Door Sign


Hello! It's finally Friday!

What do you have going on this weekend?
For me it's kids activities and hopefully a little crafting time.

I'm so excited to show you this door hanger I made for a ladies grand daughter.
She told me her GD's room was pink/brown and that she loved Princess's and that Ariel was her favorite.

This photo just doesn't do it justice.


I used a lot of pop dots and it gave it so much dimension.   


Anyhow I hope that this little girl loved it. I sure loved making it for her.

Thanks for stopping by to take a look and I hope you have a blessed weekend.
Come back again soon!


Thursday, February 21, 2013

XOXOXOXO

Hello and happy Thursday!  This week seems to be flying by.  
I hope that your having a good week thus far.

Today I wanted to share a few more cards I had made for Valentine's Day.

This first card I used scrap paper.  
The heart paper I believe though is Anna Griffen, I think.
The brown paper I embossed with a Sizzix die
The bear image I got from the Silhouette store.
I chalked around him a little and stamped xoxo for the sentiment.


This next card is also found in the Silhouette Store.  


And lastly easy peasy this little card I let the paper do all the work. I added a decorated side border and some ribbon onto a red card and the worlds fastest card.


Well that's it for today.  Thanks for stopping by and taking a look.


Boys will be boys

Hi I hope your having a great week thus far!
 I have a million things to show you and not enough time lol. 

 Today I wanted to start with a paper bag album. I had a customer order, a "boy" paper bag album at my last farmers market. I got so busy with life and everything that I put off the order until the night before I said I'd have it ready. Well if your like me you don't just whip something up real quick. I always say that but it never happens that way.
So anyhow it only took me 2 hours and I think it turned out pretty dang cute. Now I did use cuts that I all ready had cut. The only cuts I made that night was the "Boys will be Boys" and the tags.


I used B is for Boys to cut the tittle at 3.84"
The dinosaur is from Create a Critter

 This frog was pre cut from Create a Critter
The tags were cut from TBBM at 4.00"

Again Create a Critter to cut this alligator

 Create a Critter for the Lion


                                    This skunk was cut using the Silhouette from the Silhouette Store


 Create a Critter for the Monkey as well


Here is the back.  
The whole book was bound together with small binding and each pocket has a tag in it to add any additional journaling or photos.

Thanks for taking a look, come back again soon!


Wednesday, February 20, 2013

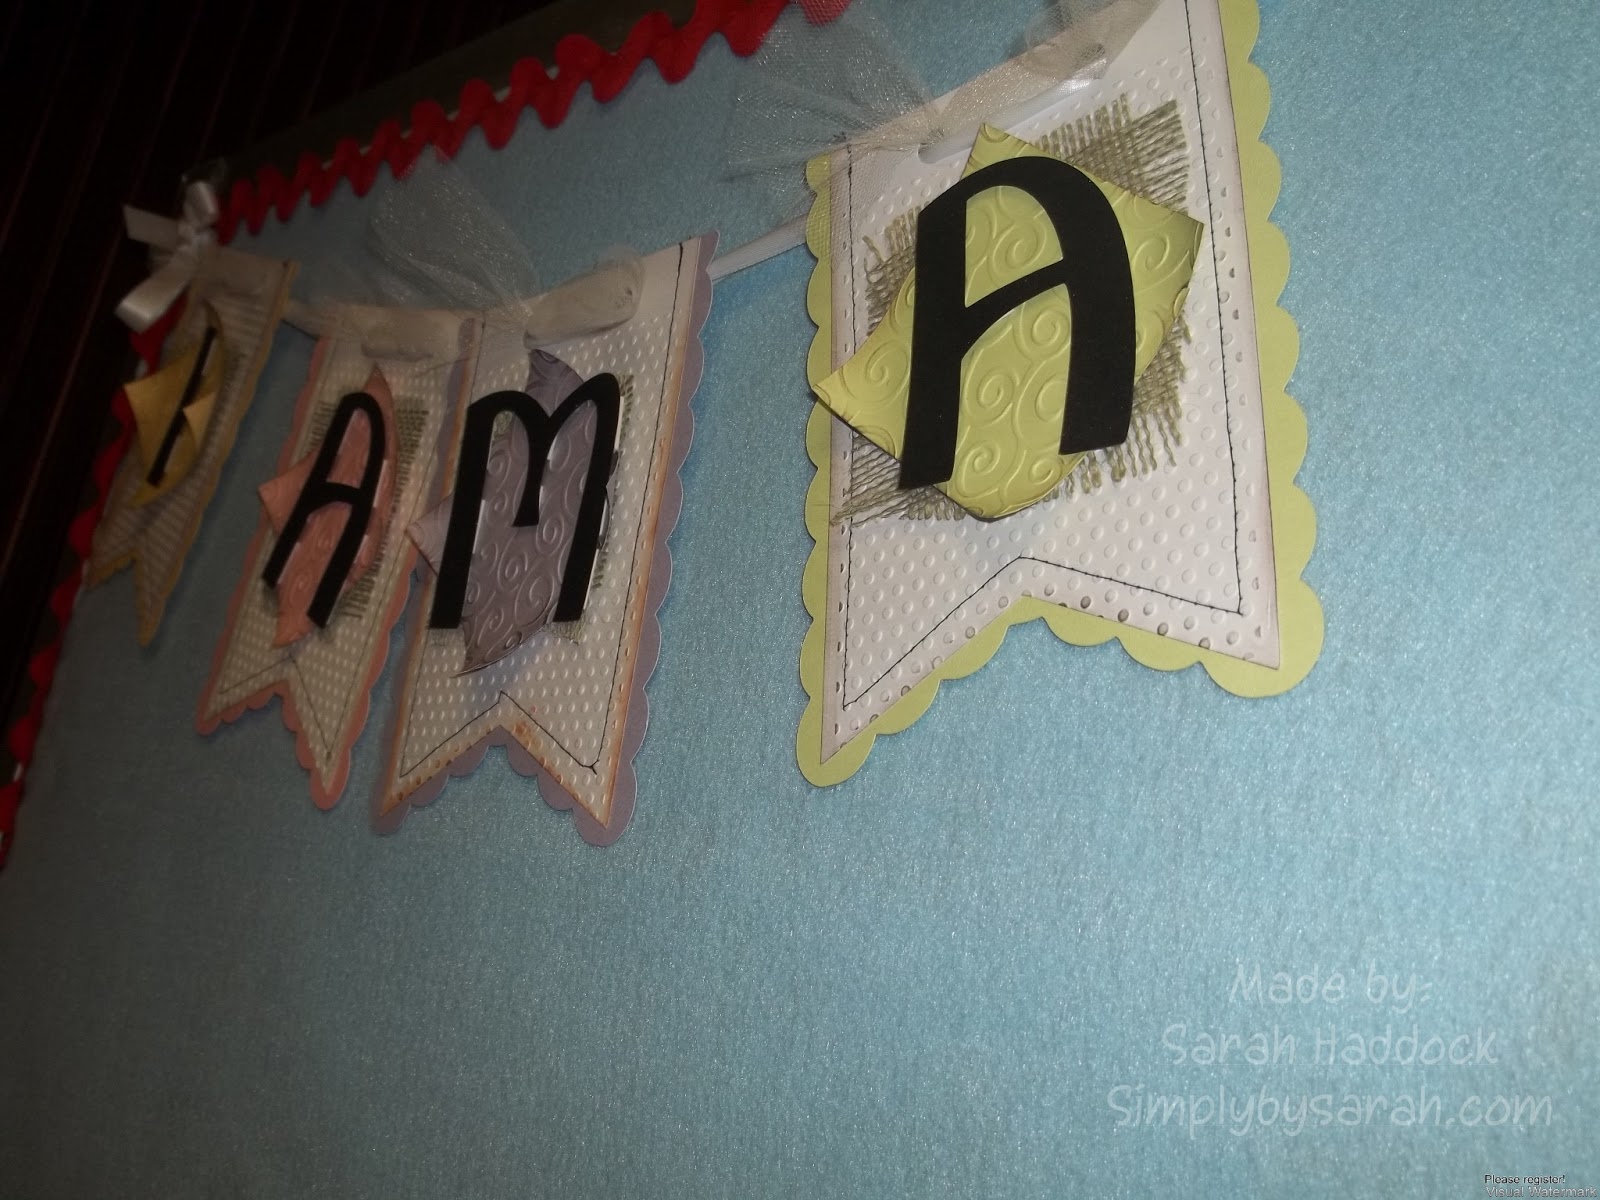
I am A Child of God, banner.

Hello!
I wanted to share a Banner I made to put up at church this year.

This year our theme in Primary is "I am a Child of God".  I took on the challenge.
Our ward boundaries changed and I ended up in a different building.  I was use to white boards with dry erase markers and magnets and moved to a felt board with chalk board on the back.  It was a challenge at first but I've come to love our board.


I sat at a 6' table and made this banner.  As I was putting all the banner pieces together I started to think it was going to be way too big.  I hadn't actually measured the board before I started the banner.  But as I started putting the banner up I realized the board was much bigger then I thought it was and as you can see it turned out to be the perfect size.


Each piece I did the same but in either a pink, yellowish green and purple.


  •  Each scalloped piece and inside white layer is cut from Pretty Pennants at 7.53"
  • Each letter is cut from Ashlyns Alphabet at 3.53"
  • Embossed each white layer 
  • I sewed each piece together using black thread.
  • Using the scraps from cutting the scalloped banner pieces I cut them in squares to back the letters.
  • Then I embossed the squares with the swirl Cuttlebug plate
  • Then added some burlap behind the letters for some dimension.
  • I used a white satin ribbon to keep it all together.  Then added some while toole to blend it all in.


I really love how it turned out.  It makes that big blue board look a little nicer and it stays up all year long.  I really love making banners I think I'm going to try and make more.

Thanks for stopping in to take a look, have a great day!!


Monday, February 18, 2013

Be Mine


Hi I'm here with another quick Valentine's Day card.  

I used Jubilee to cut out the little banner and stamped it with white ink.
The girl holding the heart is from A Child's Year.


The background paper was from my scrap pile but I believe is from Heidi Swap

Thanks for looking, come back again soon!!


Sunday, February 17, 2013

Happy Love Day


Hi again, I know it's been a while.  
I have so much to show you.  I want to start with a couple of cards that I made for Valentine's Day.

For Christmas I received at Cameo and I've just not had much time to use it.  Good thing it's super easy to figure out.  


This frog is just adorable.  I found him in the Silhouette store. 

 I used pop ups on the frog to give him a little dimension.  I tried to show the dimension in the photo but it really doesn't  do it justice.


Well here's my card for today.  I have a couple more Valentine's Day cards I will share tomorrow.  Thanks for looking, hope you come back again soon.


Sunday, January 6, 2013

Christmas Door


Hello hope everyone's weekend has been good.  
I'm still here and everyone is still healthy so I can't complain one bit.  
I wanted to show you the cards I sent out to friends and family for Christmas this year.

I got the idea from Stamp N Design  She has a free template for her door but I decided to just go with a square door.  I had 40 of these to make with not a lot of time to do it.  I thought they would be quick and easy.  Well I got the easy part right.  But wow it took a lot of time and paper.


Now each square area on the door is 3 deep.  I used all the same maroon color paper but inked the middle layer edges with Stampin up Cranberry Crisp. So I had to cut 160 first layer squares 160 middle layer and 160 top layer.  It was half that for the longer rectangles on the top but there was a lot of cutting involved

I then pop dotted the wreaths on each side of the door.


  • Card size is 5"x 6 3/4"
  • Wreath is from Christmas Cartridge cut at 2.26" Then embellished with stickles.
  • Oval door decor cut from George and Basic Shapes from DCWV silver paper
  • Silver Brads for door knobs.
  • Inside stamped with the new Fiskars "Seasons Greetings" stamps


Each card had family photo inserted as the first thing the recipient received once they opened the card.


Thank you for taking a look. I hope you like our Family's Christmas card.


P.S.  For Christmas I received the Cameo and low and behold in the Silhouette store they had this exact card cut file in there.
Related Posts Plugin for WordPress, Blogger...